Collaborative robots can be used to automate measurements currently made with manual micrometers, height gauges, and calipers. In this article, we'll look at how to automate each of these manual gauging tools.
Using an LVDT as a Robotic Micrometer or Automated Height Gauge
Article from | New Scale Robotics
Micrometer and Height Gauge Measurements Using a Linear Probe (LVDT)
An LVDT (linear variable differential transformer, or linear probe) can be used with a collaborative robot to emulate a micrometer or a height gauge.
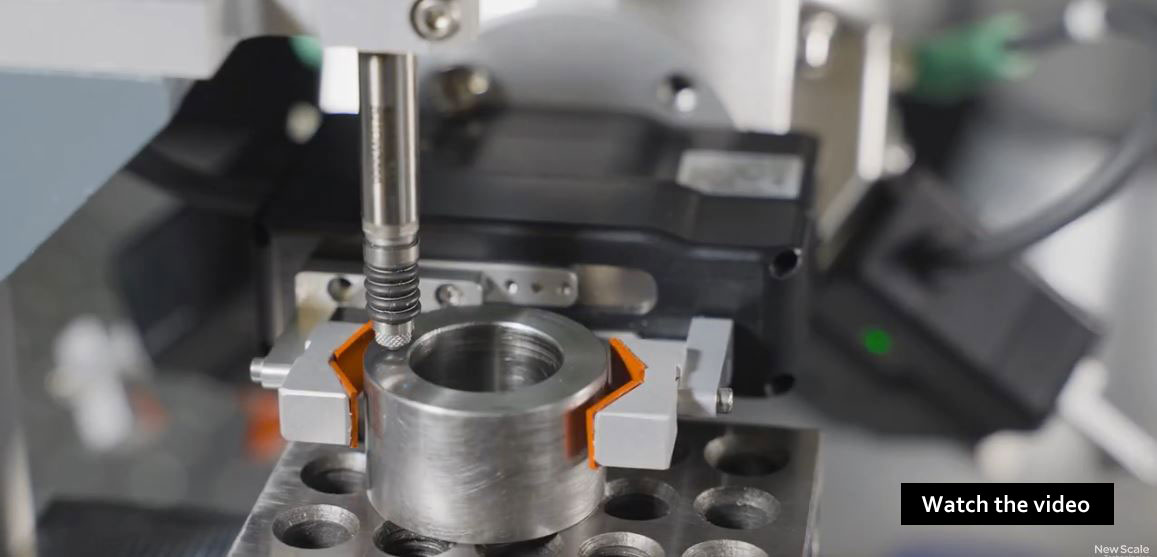
For example, with a Q-Span robotic gauging system, the linear probe is mounted in position over a fixed measurement surface. The robotic gripper moves the part to a measurement fixture under the probe. The robotic system’s control software then commands the linear probe to actuate and take a measurement, capturing the resulting data from the gauge.
PHOTO: Linear probe being used with a Q-Span System to emulate a manual micrometer or height gauge, automating measurement of the thickness of a machined part.
The linear probe’s spindle displacement from the null position corresponds to the height of the part being measured. In LVDT sensors, the spindle is a metal core that moves through coil windings in the probe body, producing an electrical signal corresponding to the spindle’s position¹. In Keyence’s proprietary scale-shot system, a CMOS sensor scans a glass scale in the sensor head’s body².
The term drop gauge is also used, referring to the motion of the spindle being lowered or “dropped” on to the surface to be measured. Air-activated sensors use air pressure to extend the spindle and a spring to retract it.
Robotic Caliper Measurements
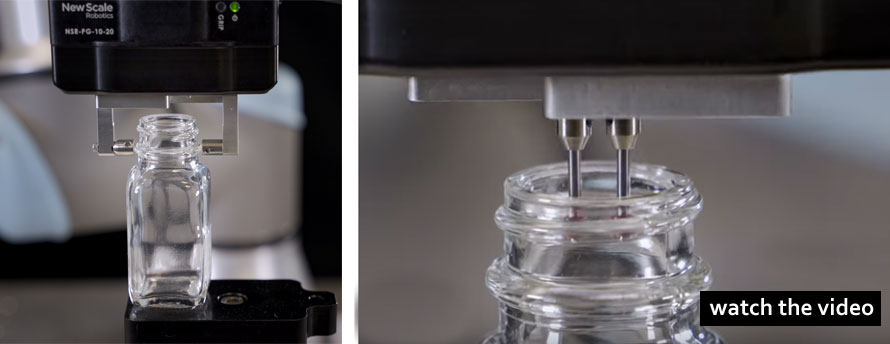
If an electric parallel gripper (see next section) has sufficient repeatability and precision, it can be fitted with metrology fingertips for use as a robotic digital caliper. The caliper is mounted directly to the robot arm (or a multi-tool mount on the robot arm). Flat or spherical metrology fingertips on the gripper are used to measure outer diameters and thicknesses. Ruby styli fingertips are used to measure inner diameters.
PHOTO: Robotic digital calipers shown at left with flat metrology fingertips measuring an outer diameter (OD), and at right with ruby styli fingertips measuring an inner diameter (ID). These robotic calipers in the Q-Span System have a measurement resolution of 2.5 µm (0.0001 inch).
Robotic Part Handling
Whether a micrometer, caliper, height gauge, or some combination of gauges is used, automated part handling is an essential part of robotic gauging. A collaborative robot can pick parts from an input area or feeder, and place them on a datum, gauge or fixture to be measured. It can then move them to an output area after measurement.
One of the simplest ways to present parts to a robot is to use input trays that are pre-loaded by operators. The robot can be easily programmed (or taught) to pick parts from known locations in the tray. Conveyors or vibrating feeders can also be used to feed and orient parts to a single pickup location. A more complex solution involves integrating a vision system to identify part locations and orientations, and sending this information to the robot.
Electric parallel grippers are a common end-of-arm tool for part handling. Gripper fingertips should be appropriate for the part, for example v-groove fingers for cylindrical parts.
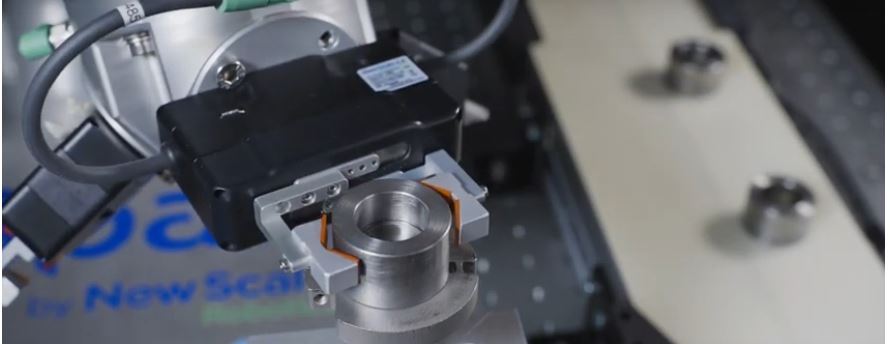
A collaborative robot using an electric parallel gripper with v-groove fingertips to center a cylindrical part.
Data Collection in Automated Gauging
Many linear probes or contact displacement sensors have cables or wireless capabilities to transmit data to a PC. However, it can be a challenge to integrate this data into a robotic gauging system. The Q-Span System solves this challenge with the Q-Span Data Server Application. This software serves as a plug-and-play interface between all of the gauges and the robot system.
Data from multiple gauges is sent through the robot to a PC in one consolidated ASCII format. The data can easily be exported via Excel or a .CSV file to the preferred quality management system (QMS) or statistical process control (SPC) software.
To enable full lights-out automation, the measurement feedback can be used to create a closed-loop manufacturing cell that automatically sends measurement data back to the machine. In a CNC machining application, for example, data can be transmitted back to the machine to automatically set machine tool offsets or alert operators when the machine tools need to be serviced. This greatly improves process control and minimizes downtime by helping machinists detect and correct process changes in real time, before they happen, while significantly reducing scrap.
Other Software Considerations
A second software consideration is robot control software. New Scale’s URCap software plugin for Universal Robots, the NSR Devices URCap, was developed specifically for part handling and metrology. It lets users employ the Universal Robots teach pendant to easily build robot programs that grasp, move and measure parts with the robotic gripper/caliper. Example programs are included with the Q-Span Application Kit.
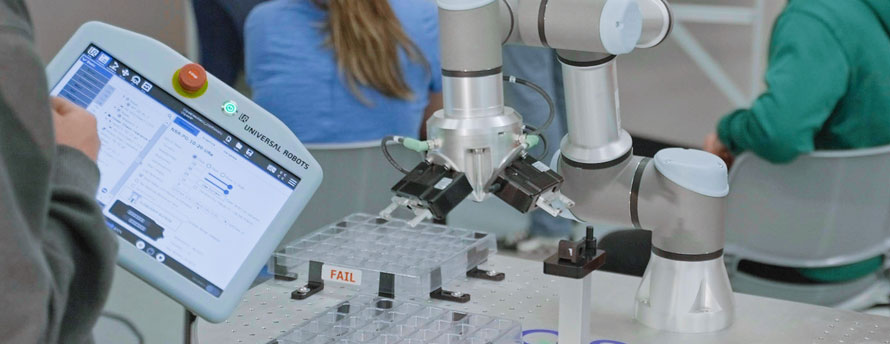
Use the NSR Devices URCap software application to build robot control programs for part handling, measurement and data collection.
Why Automate Caliper and Micrometer Measurements?
Collaborative robots make it relatively simple to replace manual calipers with an end-of-arm robotic caliper, and to replace manual micrometers or height gauges with an LVDT or linear probe. In both cases, automation improves repeatability by eliminating human variability, such as how the gauge is applied to the part and how much pressure is used.
A Q-Span System offers the additional benefits of integrated part handling and the ability to consolidate data from multiple tools for process control.
Automating repetitive and boring gauging tasks improves throughput and quality, and frees quality inspectors to perform higher-value work.
The content & opinions in this article are the author’s and do not necessarily represent the views of RoboticsTomorrow
Featured Product
