By the end of this guide, you will have a basic understanding of the components needed to set up a mesh network, strategies to overcome common roadblocks for long-range, ground networks and the steps required to get the network up and running.
 Advanced Ground Robotics Need Advanced Networking Solutions
Article from | Doodle Labs
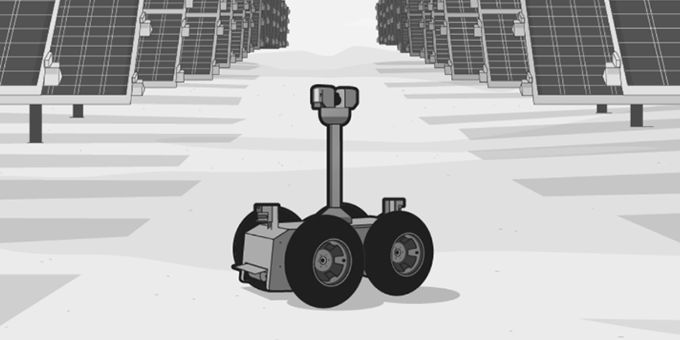
Uncrewed ground vehicles (UGVs) can be leveraged to support outdoor industrial, commercial and public safety endeavors in countless ways, including scanning and mapping, surveillance and delivery to name just a few.
But outdoor environments present numerous challenges to maintaining a network on which these advanced machines rely to connect, transmit data and get their work done.
This guide will walk you through the process of creating a wireless network that allows multiple UGVs to communicate with each other and a central control station.
By the end of this guide, you will have a basic understanding of the components needed to set up a mesh network, strategies to overcome common roadblocks for long-range, ground networks and the steps required to get the network up and running.
THE PROBLEM WITH ‘TRADITIONAL’ NETWORKING APPROACHES
Using an existing Wi-Fi network doesn’t always reliably support connectivity.
Designed for High Throughput over Short Range
When it comes to setting up an outdoor mesh network for uncrewed ground vehicles, relying solely on existing Wi-Fi networks can present certain challenges. Wi-Fi technology is primarily designed for high throughput over short distances, typically within the range of a few hundred feet. Beyond this range, the effectiveness of Wi-Fi connectivity diminishes significantly. Even with the latest enhancements in Wi-Fi standards such as wider bandwidth and higher modulation schemes like 256-QAM (Quadrature Amplitude Modulation), the benefits start to decline beyond approximately 50 meters.
Limitations on Improving Connectivity
Moreover, utilizing more than two antennas in a Wi-Fi setup may not yield substantial improvements in connectivity. While multiple antennas can enhance signal reception and transmission in certain scenarios, they have limited effectiveness when it comes to extending the range of Wi-Fi networks in an outdoor environment. This limitation poses a significant challenge in achieving reliable connectivity for UGVs operating at larger distances from the Wi-Fi access points.
LTE coverage is not always available.
Reliant on existing infrastructure
Another hurdle in establishing an outdoor mesh network for UGVs is the inconsistent availability of LTE coverage. LTE networks provide wireless communication capabilities over cellular infrastructure, offering greater coverage compared to Wi-Fi networks. However, the reach of LTE networks is not ubiquitous, especially in remote or sparsely populated areas. This limited coverage can be problematic when deploying UGVs in diverse environments, such as rural or off-grid locations.
Higher Latency
Furthermore, in many LTE deployments, traffic often passes through a cloud server, leading to higher end-to-end latency. This additional delay in data transmission can impact real-time communication and control of UGVs, affecting their responsiveness and overall performance. Depending solely on LTE networks for establishing a robust mesh network may not always be feasible or optimal due to these coverage limitations and increased latency.
COMMON NETWORKING CHALLENGES
(And How Doodle Labs Mesh Rider Radios address them) Topology
Line of Sight
In general, the best link quality is achieved when there is a line-of-sight (LOS) between the UGV antennas and the GCS antennas, plus sufficient Fresnel Zone clearance. Obstructions such as hills and foliage can attenuate or even block the signal entirely.
Penetration
Lower frequency RF transmission offers better penetration of foliage and a larger antenna surface to capture signals, but comes with a larger Fresnel Zone. As a rule of thumb, with the antennas around shoulder height, we recommend the 2-3 GHz range for optimal tradeoff between free-space path-loss and fading due to inadequate Fresnel Zone clearance.
We recommend starting with a Fresnel Zone calculator to help decide the best frequency-to-height ratio for your particular use-case.
Application Requirements
Bandwidth and Latency
In practical terms, these two parameters determine the usability of your link for your UGV application. Depending on what you’re using the robot(s) for, the type of data you need to send will determine your bandwidth, and your tolerance for delays on the link will determine your max acceptable latency.
For reference, streaming HD video is approximately 2-3 Mbps, and remotely operating a vehicle requires latency sub 10 ms.
Urban environments
Interference
Urban environments are typically very noisy in terms of RF, especially in the Unlicensed bands. If you’ve ever tried using your phone at a concert or music festival, you’ve experienced trying to connect over a congested network; the interference on a network limits range and throughput.
Ground level challenges
High speed, low to the ground
When RF signals hit the ground, they bounce and scatter in different directions depending on the terrain. The constructive and destructive interference between the multiple signal paths leads to wide variations in received signal strength over just tens of centimeters, and if the UGV is moving at high speed, it is difficult for the radio’s rate control algorithms to keep up.
Large networks
Number of nodes
Scaling a mesh network up in terms of number of nodes can be one of the most challenging parts of building a mesh network.
The amount of background traffic and number of peer-to-peer associations in a single localized mesh network grows with the square of the number of nodes. If more than 10 nodes are required, advanced configurations are most often required.
Type of traffic
Building out a large-scale mesh network to support the operation of UGVs and other team members and/or equipment must naturally allow for the transmission of many different types of data, which could include HD video, LIDAR, sensor data, command and-control, telemetry and/or any number of other options, all at once.
Each has different associated throughput requirements and latency tolerances, so determining a full picture of the traffic that the mesh network needs to pass is among the most important steps to properly configure it.
Standard network bandwidth measuring tools such as iperf do not typically take into account the different types of traffic present in a real deployment. For example, broadcast transmissions operate very differently from unicast ones. In general, we recommend limiting broadcasting to very light usage such as periodic service discovery. If anything more than that is required, then it should be accounted for in the network design.
HOW TO SET UP AN OUTDOOR MESH NETWORK FOR UGVs
1. Determine System Requirements
The first and most important step to setting up an outdoor mesh network for UGVs is to map out your use-case: What is it you’re are trying to achieve with the UGV technology and what thresholds do your network have to clear in order to achieve it?
Questions to ask at this stage include:
- What make up the nodes of your network? Strictly UGVs, or some mix of ground vehicles, UAVs, other equipment or connected teams of people?
- What type of data will you need to traffic in your network?
- What is the maximum allowed latency for each type of data?
2. Determine Coverage Area
As a next step, determine the size of area you wish to cover with the mesh network.
Map out the terrain in your desired coverage area, including natural terrain like hills and obstacles such as trees or buildings.
Take special care to identify dead-zones in the coverage area. Consider ease of access for UGVs – are there trails to get to a destination point? Is there dense terrain? Take stock of the time it takes to hit every mapped-out location.
A few tools that can be especially useful during this first step:
• The Elevation tool in ATAK
• RF performance / Prediction analysis tools like Cloud RF
• Google Earth. One can’t overvalue this classic source’s accurate estimate height on map points, and the ability to drop your own pins.
3. Choose appropriate hardware

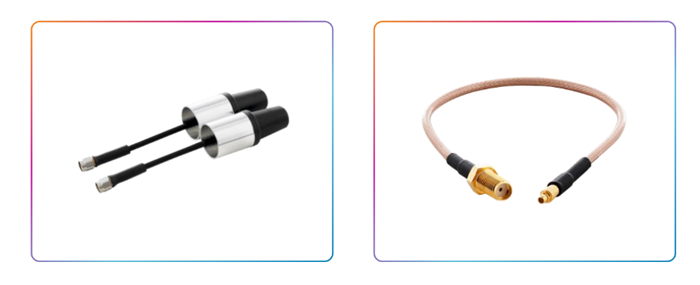
Doodle Labs offers the Mesh Rider Radio in multiple form factors relevant to UGV use cases, including OEM, mini-OEM, nano-OEM and the Wearable.
The OEM form-factor, along with the mini-OEM and nano-OEM, are appropriate for UGVs that call for a fully-embedded datalink solution. The mini-OEM and nano-OEM are best fit for platforms that call for radios with a small footprint.
If you’re in need of a rugged, fixed installation and/or one mounted on a vehicle, the Wearable form-factor is the best choice. It is fully enclosed.
On the controller side, you can go with the Wearable or any of the OEM options, depending upon your choice of controller model.
Mesh Rider is available in many frequency options: unlicensed - 900Mhz, 2.4GHz, 5.8GHz, and licensed 1.3GHz, 2.2GHz etc. We can cover many scenarios – including NLOS where foliage and/or building penetration are required.
4. Plan network layout
Antenna alignment and height play a crucial role in the success of a mesh network for UGVs. It is important to position the antennas in a way that maximizes line-of-sight between the UGV and other network nodes. This can be achieved by placing the antennas at a sufficient height, such as on masts or elevated platforms. Additionally, careful alignment of the antennas should be done to minimize interference and signal degradation.
Cable considerations are also important, here. High-quality cables with proper shielding should be used to minimize signal loss and maintain signal integrity over longer distances. It is crucial to select cables of appropriate length to ensure efficient network connectivity without excessive cable runs that can introduce signal attenuation.
Antenna gain is a significant factor in determining the coverage range and signal strength of the network. Higher gain antennas can transmit and receive signals over longer distances and are particularly useful in situations where the UGV may operate at extended ranges from the control station or other nodes. However, it's important to strike a balance between gain and beam width to ensure both long-range coverage and sufficient coverage in the immediate vicinity of the UGV.
5. Configure nodes
Mesh Rider Radios are designed to effectively bridge all devices that are connected on their ethernet interface.
Similar to an ethernet switch in an office, into which any computer is plugged and will be on the same LAN and they’ll be able to talk directly one another, so long as they are on the same IP sub-net, Mesh Rider radios essentially extend a LAN over the entire mesh, so any device that’s plugged into the internet ports on the devices will be on the same LAN. No configuration is required, other than a simple change to username and password.
6. Test the network
Since you planned the network layout in step four and know what type of network traffic you’ll be sending, you need to check the network to see how much margin you have and measure how real-world performance compares to expected outcomes.
A useful tool in Mesh Rider to assist in this process is the “Link status log.”
The Link Status Log utility is designed to log the each radio's link status over time. It keeps very detailed logs on the performance of each node. Aside from downloading the logs, you can also get the latest status from any particular node.
7. Integrate with Control Station Software
You’re likely to want to integrate your control station software directly to the nodes in your network.
Control Station Software can make use of Mesh Rider Radio’s API to talk to the radio and get status information from the radio including things like signal strength, network load and any warning signs.
8. Deploy UGVs
You’ve successfully planned and configured an outdoor mesh network for UGVs – now it’s time to deploy.
Get your robots out in the field, watch the nodes on the dynamic mesh network establish and maintain connectivity and observe real-time data payload transfer.
9. Scale the network
The beauty of a true mesh network is that the initial deployment of UGVs is just the start – you can build on the foundation you’ve designed to develop larger, scaled deployments with additional nodes and cover even more ground.
The only limitation is your imagination.
The content & opinions in this article are the author’s and do not necessarily represent the views of RoboticsTomorrow
Featured Product