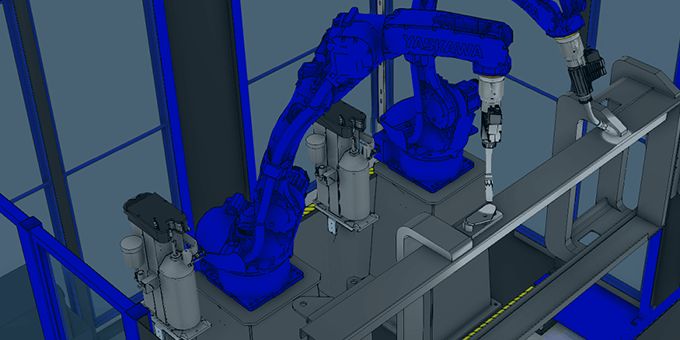
It's easy to show a robot being programmed in a matter of minutes inside of a controlled virtual environment. But those programs need to translate to something useful in the real robot cell. The points that the robot will follow need to line up with the part properly.
 Virtual to Reality: Delivering Accuracy to The Real World

Chris Heit, Application Engineering Specialist | Octopuz
“How accurate is the program when you run it on the real robot?” is possibly the most common question asked to any OCTOPUZ employee when discussing OLRP, and one of the most important. It’s easy to show a robot being programmed in a matter of minutes inside of a controlled virtual environment. But those programs need to translate to something useful in the real robot cell. The points that the robot will follow need to line up with the part properly.
In the virtual world: everything is perfect. In the real world: nothing is perfect. The reality is that although OLRP can produce programs that are very accurate when transferred to real robots, multiple factors can affect accuracy. Parts and fixtures are warped, torches get bent, robots become unmastered, etc. It will never be possible to eliminate these factors, so we instead look for ways to compensate for them. In this blog post, we will discuss some of the most common factors that affect the accuracy of OLRP programs, and some tips and tricks for dealing with them.
Unmastered Robot
Some would consider this to be a nightmare scenario. For those readers who are not familiar with the term “unmastered” in regards to robots, it’s when an industrial robot arm is designed and programmed to know exactly where it is in space, based on how the motors of the arm have manipulated the different joints of the robot. In other words, the robot will know at any given time the degree values of the different joints in the arm. Over time, the robot gets into a state where it thinks its joints are at one value when in reality they will be at a very different value. For example, an unmastered robot might think that the last joint in the arm is at 60 degrees when in reality the joint might be at 65 degrees.
All robots slowly become unmastered over time due to natural wear. It’s important to have your robots maintained, serviced, and routinely re-mastered to avoid repeatability and accuracy issues with online programming as well as OLRP.
Although there are a multitude of issues that being in an unmastered state can cause for robots, even with online tasks, it is a very easy issue to diagnose. An unmastered robot will not be able to teach any accurate tool frame or base/user frame. Points from programs that were taught previously will also start drifting from their original location. Alignment methods for OLRP largely rely on points taken by the physical robot. Alignment with an unmastered robot, that has inaccurate tool frames, and does not fully understand where it is in space will not produce accurate results.
The only true solution to this problem is remastering the robot. The reason some would consider this to be a nightmare is that any programs which were taught on the robot while the robot was unmastered will be affected since we are changing the robot’s understanding of its programmed joint values. However, any programs that were taught while the robot was still properly mastered, and that have become inaccurate over time due to the un-mastering will actually increase inaccuracy.
Inaccurate Tool Frame
An easy problem to fix. Alignment methods for virtual OLRP cells rely on points taken by the physical robot. If the tool frame is not accurately taught at a specific feature of the tool (such as the tip of a welding wire), the points taken will be inaccurate when transferred to the virtual world, and the alignment will be off. The easy solution here is to teach a new tool frame to be used for alignment and validate that it is taught in the correct location by rotating it around the TCP in space.
Poorly Setup Systems
OLRP software assumes that components in physical robot cells are properly built and assembled. For example: let’s say that we have a robot that is attached to a linear rail axis, and the robot is supposed to be mounted at level with the mountplate of the carriage of the rail. If this was not done properly in the physical robot cell, and the robot is mounted off-level, then large inaccuracies can occur. The physical robot would provide coordinates of certain points within the robot cell, which will be used for alignment, that are incorrect. The robot might think that a certain feature, which is being aligned, is located at X=100, Y=100, Z=100. However, due to the robot not being mounted properly to the rail and being slightly tilted, the feature might actually be located at X=105, Y=101, Z=110.
Diagnosing this issue is usually not difficult. The method for doing so depends on the system in question. The fix in the OLRP software can also be straightforward: simply adjust the virtual cell to account for the un-leveled mounting or other setup issues. What can be difficult is measuring how unleveled or how crooked certain physical robot setups are. There are a lot of options for accomplishing this, based on the configuration of the robot cell, and where the issue lies. However, the most precise way of measuring this is often with a laser measurement system. Difficulties in quantifying poor setup can make this issue difficult to fully overcome in some cases.
Warped Parts, Tooling, and Fixtures
Whether intentional or not, the deviation between CAD models and actual parts, tooling, and fixtures will cause alignment inaccuracies for virtual OLRP cells. On one level, if the CAD models being used are completely incorrect, that’s a simple issue with a simple fix: correct your CAD models. On a more complex level, warpage and deformation is everywhere and all around us. Things deform under their own weight when exposed to extreme heat (like in welding), under changes of temperature and pressure in the environment, and the list goes on. What makes it even more complex is that warpage can be a very difficult thing to measure and quantify, and even more difficult to account for in CAD models.
When the warpage is intentional (for example a workpiece that is intentionally in a warped state before being welded, so that it deforms into the intended shape during the welding process due to the heat), the best way to account for this is to align the virtual OLRP cell using CAD models which include this warpage. In this example case: CAD of the part before it is welded, not the final product.
In the more common scenarios, when the warpage is unintentional, there are a variety of different tools available for getting accurate paths on your robot from OLRP:
- Touch-ups: the manual solution. Simply dry-run the OLRP program on the robot, and manually adjust any inaccurate points on the teach pendant. This solution is less than ideal since it does require robot down-time and use of the teach pendant. The number of touch-ups that need to be done, assuming a well-aligned cell, depends on how warped the parts and fixtures are, so there can be quite a bit of variation in how much effort will be required for this solution. However, this is the cheapest and easiest solution to accounting for warpage.
- Touch-Sensing: the most accurate solution. Having the robot search for the exact location where it needs to weld on the part in question is a sure way of making sure that program points are accurate. Touch-sensing can also be a useful tool for addressing fixtures that are not entirely accurate, and the locations of the parts they hold deviate from part-to-part. However, this solution does not come without cost. Touch-sensing will require additional hardware and software packages that rarely come standard on industrial robots. Touch-sensing operations will also significantly increase cycle-time and are limited to welding operations. For these reasons, while touch-sensing is the most accurate solution, it is also the most expensive.
- Vision Systems: the most accurate solution for non-welding applications. If your robot is doing something other than welding, such as machining, or 3D printing, touch-sensing will not be available to you. However, there is a wide range of vision system solutions that can fill that void. These systems will all follow the same principle of using some form of camera and algorithm to search the part for certain landmarks that will indicate the intended locations of program points. However, these systems do have the same drawbacks as touch-sensing, in that they are often more expensive and can increase cycle-time in many cases.
- Seam Tracking: the medium solution. For those readers who are not familiar with seam tracking technology, it’s a solution that is available for industrial robots performing welding operations (almost exclusively with welds that contain weave parameters) that continuously measures the location of the wire-tip of the welding torch relative to the joint being welded. Seam tracking corrections primarily account for drift in a path to keep the torch in the seam while welding. We won’t get into the technical details of how these systems work in this article. However, since these systems actively correct the locations of weld points in a robot program, they can also improve the accuracy of OLRP programs that are transferred to physical robots. Much like touch-sensing and vision systems, seam tracking packages rarely come standard with industrial robots and require additional investment in the system. Additionally, it is restricted to only welding operations, and are limited in their ability to improve accuracy; it will be able to correct weld points that are off from their intended location by a few millimeters, it will not be effective at correcting points that are off by several centimeters. These corrections rely on an accurate starting point of the weld, which can only be corrected using one of the above methods.
Part Variation
Depending on the tolerances at other steps in your manufacturing process, there can be significant variation between parts that are being loaded into your robot cell. This can be seen in features on the parts themselves, as well as how the parts fit into the tooling and fixtures that are holding them. The tools mentioned in the section above can all be applied equally to this source of inaccuracy. However, there is the additional solution of lowering tolerances in other steps of the process. More consistent parts will have more consistent accuracy in the robot programs being run on them. More consistent tooling and fixturing will have the same effect.
When aligning virtual robot cells to real robot cells, there will always be some error. We don’t live in a perfect world, so we need to take steps to account for the imperfections around us. This article provides you with a better idea of what some of the most common sources of imperfection and inaccuracy are when it comes to delivering OLRP, and how to effectively address them. Offline Robot Programming is the future of robot programming, and we will not allow hardware imperfections to stop that.
The content & opinions in this article are the author’s and do not necessarily represent the views of RoboticsTomorrow
Featured Product

